Monday, April 28, 2025

The Complete Guide to Growing Lettuce at Home


The Complete Guide to Growing Lettuce at Home

Growing your own lettuce is one of the most rewarding kitchen garden experiences. Fresh, crisp lettuce harvested moments before eating offers flavor that store-bought varieties simply can't match. As a fast-growing, cool-season crop, lettuce is perfect for beginners and experienced gardeners alike. This guide covers everything you need to know to grow abundant, delicious lettuce at home.

Basic Growing Requirements

Spacing

  • Seed spacing: Sow seeds 1 inch apart in rows
  • Seedling spacing after thinning:
    • Leaf lettuce: 4-6 inches apart
    • Romaine/Cos: 6-8 inches apart
    • Butterhead: 6-8 inches apart
    • Crisphead/Iceberg: 10-12 inches apart
  • Row spacing: 12-18 inches between rows

Light Requirements

  • Lettuce prefers partial sun to partial shade
  • 4-6 hours of direct sunlight is ideal
  • In hot climates, afternoon shade is beneficial
  • Too much direct sunlight in hot weather can cause bolting (premature flowering)

Temperature Preferences

  • Optimal soil temperature for germination: 60-70°F (15-21°C)
  • Growing temperature range: 45-75°F (7-24°C)
  • Ideal growing temperature: 60-65°F (15-18°C)
  • Lettuce is frost-tolerant but will be damaged by hard freezes

Days to Germination

  • 2-8 days under optimal conditions
  • Generally emerges within 7 days at 68°F (20°C)
  • Germination slows at cooler temperatures
  • May not germinate well above 75°F (24°C)

Soil Preparation and Planting

Soil Requirements

  • Well-draining, loamy soil rich in organic matter
  • pH range: 6.0-7.0 (slightly acidic to neutral)
  • Add compost or well-rotted manure before planting

Planting Times

  • Spring: 2-4 weeks before the last frost date
  • Fall: 4-8 weeks before the first frost date
  • Year-round: In mild climates or with protection
  • For continuous harvest, sow small amounts every 7-10 days

Planting Depth

  • Sow seeds very shallow, approximately ¼ inch deep
  • Lettuce seeds need light to germinate
  • Gently press into soil rather than burying deeply

Care During Growth

Watering

  • Keep soil consistently moist but not waterlogged
  • Water gently to avoid displacing seeds or damaging young plants
  • Water in the morning to reduce disease risk
  • Approximately 1-1.5 inches of water per week

Fertilizing

  • Light feeder - doesn't require heavy fertilization
  • Apply balanced, all-purpose organic fertilizer before planting
  • Side dress with compost tea or diluted liquid fertilizer every 3-4 weeks

Mulching

  • Apply a light layer of organic mulch to:
    • Retain soil moisture
    • Suppress weeds
    • Keep soil cool in warm weather
    • Keep leaves clean from soil splash

Common Problems

Pests

  • Aphids
  • Slugs and snails
  • Cutworms


  • Flea beetles


  • Rabbits and other wildlife

Diseases

  • Downy mildew


  • Powdery mildew


  • Bottom rot


  • Lettuce mosaic virus


Environmental Issues

  • Bolting (premature flowering due to heat or long days)
  • Tip burn (caused by calcium deficiency or irregular watering)
  • Bitterness (usually from heat stress or age)

Harvesting

When to Harvest

  • Baby greens: 3-4 weeks after planting
  • Full-sized leaf lettuce: 45-60 days after planting
  • Head lettuce varieties: 60-90 days after planting

Harvesting Methods

  • Cut-and-come-again method: Harvest outer leaves as needed, allowing center to continue growing
  • Whole plant harvest: Cut entire plant at soil level
  • Harvest in the morning for best flavor and crispness

Growing in Containers

  • Choose containers at least 6 inches deep with drainage holes
  • Use high-quality potting mix designed for vegetables
  • Space plants more closely than in-ground (about 4 inches apart)
  • Water more frequently as containers dry out faster
  • Consider heat-resistant varieties for container growing

Season Extension

  • Use row covers for frost protection in early spring and late fall
  • Consider cold frames or small hoop houses for winter growing
  • Select heat-resistant varieties for summer production
  • Provide afternoon shade during hot weather

Recommended Varieties

For Heat Resistance

  • Jericho
  • Summer Crisp types (Nevada, Muir)
  • Black Seeded Simpson

For Cold Tolerance

  • Winter Density
  • Arctic King
  • Rouge d'Hiver

For Container Growing

  • Tom Thumb
  • Little Gem
  • Any leaf lettuce mix

Final Tips for Success

  • Succession plant every 10-14 days for continuous harvest
  • Interplant with slower-growing vegetables to maximize space
  • Harvest regularly to encourage continued production
  • Plant in areas with good air circulation to reduce disease
  • Consider growing microgreens indoors year-round for quick harvests

Happy growing!


Growing Beets: A Complete Guide to Growing Beets Successfully


Growing Beets: A Complete Guide to Growing Beets Successfully

Beets are a nutritious and versatile root vegetable that can be grown in a variety of climates. This guide will provide you with all the information you need to successfully grow beets in your garden.

Choosing the Right Variety

There are several varieties of beets, each with its own unique flavor and characteristics. Some popular varieties include:

  • Detroit Dark Red: Known for its sweet flavor and deep red color.

  • Chioggia: A striped variety with a sweet taste and beautiful appearance.

  • Golden Beets: These have a milder flavor and vibrant yellow color.

Choose a variety that suits your taste preferences and growing conditions.


Soil Preparation

Beets thrive in well-drained, loamy soil with a pH between 6.0 and 7.0. Here are some steps to prepare your soil:

  1. Test the Soil: Use a soil test kit to determine pH and nutrient levels.

  2. Amend the Soil: Add organic matter such as compost or well-rotted manure to improve soil structure and fertility.

  3. Tilling: Loosen the soil to a depth of at least 12 inches to promote root growth.

Planting Beets

When to Plant

Beets can be planted in early spring or late summer, depending on your climate. They prefer cooler temperatures, so aim for a planting time when daytime temperatures are between 50°F and 75°F (10°C to 24°C).

How to Plant

  1. Spacing: Sow seeds about 1 inch apart in rows that are 12-18 inches apart.

  2. Depth: Plant seeds about 1/2 inch deep.

  3. Watering: Water the seeds thoroughly after planting to ensure good germination.

Care and Maintenance

Watering

Beets require consistent moisture, especially during dry spells. Aim for about 1 inch of water per week, either from rainfall or irrigation.

Thinning

Once seedlings are about 2 inches tall, thin them to allow for proper spacing. Leave about 3-4 inches between each plant to ensure they have enough room to grow.

Fertilization

Beets benefit from a balanced fertilizer. Apply a nitrogen-rich fertilizer when the plants are about 4 inches tall, and follow up with a phosphorus and potassium-rich fertilizer as they mature.

Pest and Disease Management

Beets can be susceptible to pests such as aphids and leaf miners, as well as diseases like downy mildew. Here are some management tips:

  • Crop Rotation: Rotate your beet crops each year to prevent disease buildup in the soil.

  • Companion Planting: Plant beets alongside crops like onions and garlic to deter pests.

  • Regular Monitoring: Check your plants regularly for signs of pests or disease and take action promptly.

Harvesting Beets

Beets are typically ready to harvest 50-70 days after planting, depending on the variety. Here’s how to know when to harvest:

  • Size: Harvest when the roots are about 1.5 to 3 inches in diameter.

  • Tops: The greens can be harvested at any time; they are edible and nutritious.

To harvest, gently loosen the soil around the beet and pull it out by the greens.

Storing Beets

Beets can be stored for several months if kept in a cool, dark place. Here are some storage tips:

  • Remove Greens: Cut off the greens, leaving about an inch of stem to prevent bleeding.

  • Storage Conditions: Store in a perforated plastic bag in the refrigerator or in a root cellar.

Conclusion

Growing beets can be a rewarding experience, providing you with delicious and nutritious vegetables. By following the steps outlined in this guide, you can ensure a successful beet harvest in your garden. Happy gardening!


How to Grow Corn: A Complete Guide


How to Grow Corn: A Complete Guide

Corn (Zea mays) is one of the most rewarding vegetables to grow in a home garden. There's nothing quite like biting into a freshly harvested ear of sweet corn that went from stalk to plate in minutes. This guide will walk you through everything you need to know to successfully grow corn in your garden.

Choosing the Right Variety

Before planting, select a corn variety that suits your climate and taste preferences:

  • Sweet corn: Most popular for home gardens with the best flavor for fresh eating
  • Field corn: Used primarily for livestock feed or grinding into cornmeal
  • Popcorn: Specifically grown for popping
  • Ornamental corn: Grown for decorative purposes

Site Selection and Preparation

Corn thrives in specific conditions:

  • Sunlight: Full sun (minimum 6-8 hours of direct sunlight daily)
  • Temperature:
    • Soil temperature: Minimum 50°F (10°C) for germination, ideally 60-65°F (16-18°C)
    • Air temperature: 60-75°F (16-24°C) for optimal growth
    • Corn is frost-sensitive, so plant after all danger of frost has passed
  • Soil: Well-draining, fertile soil with pH between 6.0-6.8
  • Location: Choose a site protected from strong winds if possible

Planting Guidelines

Spacing

  • Row spacing: 30-36 inches (75-90 cm) between rows
  • Plant spacing: 8-12 inches (20-30 cm) between plants
  • Block planting: Plant in blocks of at least 4 rows rather than long single rows to improve pollination

Planting Depth and Method

  • Plant seeds 1-2 inches (2.5-5 cm) deep
  • Sow 2-3 seeds per hole and thin to the strongest seedling

Germination

  • Days to germination: 7-14 days, depending on soil temperature
  • Emergence time: Faster in warmer soil (as quick as 4-5 days in ideal conditions)

Watering Requirements

Corn needs consistent moisture, especially during these critical periods:

  • During germination
  • When tassels form
  • When ears are developing

Aim for:

  • 1-1.5 inches (2.5-4 cm) of water per week
  • Deep watering at soil level to avoid washing away pollen
  • More frequent watering during hot, dry periods

Fertilization

Corn is a heavy feeder, requiring:

  • Before planting: Work compost or aged manure into soil
  • At planting: Apply balanced fertilizer (10-10-10)
  • When plants are 8-12 inches tall: Side-dress with nitrogen-rich fertilizer
  • When silks appear: Additional light feeding can improve ear development

Common Challenges and Solutions

Pests

  • Corn earworms: Use mineral oil drops on silk or choose resistant varieties


  • European corn borers: Remove and destroy affected plants


  • Raccoons and birds: Install physical barriers or fencing before harvest time


Diseases

  • Corn smut: Remove affected areas before spores spread
  • Leaf blights: Ensure proper spacing for air circulation and avoid overhead watering

Pollination

Corn is wind-pollinated, which is why block planting is crucial:

  • Pollen from the tassels (male flowers) must reach the silks (female parts)
  • Each silk connects to a potential kernel
  • For small plantings, you can hand-pollinate by shaking tassels over silks

Harvesting

  • Time to maturity: 60-100 days from planting, depending on variety
  • Harvest indicators:
    • Silks have darkened and dried
    • Kernels are plump and produce a milky juice when punctured
    • Ears feel full and firm through the husk

Tips for Success

  • Succession planting: Stagger plantings 2-3 weeks apart for continuous harvest
  • Companion planting: Consider the "Three Sisters" method (planting corn with beans and squash)
  • Mulching: Apply 2-3 inches of mulch to conserve moisture and suppress weeds
  • Support: In windy areas, consider mounding soil around the base of stalks as they grow

With proper care and attention to these guidelines, you'll be enjoying delicious homegrown corn in just a few months. Remember that corn is a relatively heavy feeder that requires consistent moisture and proper pollination to produce well-filled ears. Happy growing!


How to Grow Basil: A Complete Guide


How to Grow Basil: A Complete Guide

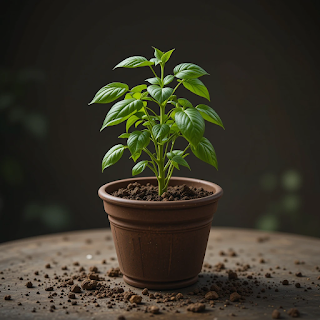
Basil is one of the most beloved culinary herbs, prized for its aromatic leaves and versatile uses in cooking. Whether you're growing it in a container on your windowsill or in your garden beds, basil is relatively easy to grow and incredibly rewarding. This guide will walk you through everything you need to know to successfully grow thriving basil plants.

Getting Started with Basil

Varieties to Consider

  • Sweet Basil (Genovese): The classic Italian variety, perfect for pesto
  • Thai Basil: Spicy with anise notes, holds up well in cooking
  • Purple Basil: Striking color with slightly spicy flavor
  • Lemon Basil: Bright citrus aroma
  • Cinnamon Basil: Sweet with mild cinnamon undertones

Planting Conditions

Timing

  • Start seeds indoors 6-8 weeks before last spring frost
  • Plant outdoors after all danger of frost has passed and soil is warm
  • Soil temperature should be at least 50°F (10°C), ideally 70°F (21°C)

Temperature Preferences

  • Optimal growing temperature: 80-90°F (27-32°C)
  • Minimum temperature: 50°F (10°C)
  • Basil is extremely frost-sensitive - even temperatures in the 40s can damage plants

Light Requirements

  • Full sun: At least 6-8 hours of direct sunlight daily
  • In very hot climates, afternoon shade can be beneficial
  • Indoor basil needs the brightest window possible (south-facing ideal)

Soil Needs

  • Well-draining, fertile soil with pH 6.0-7.5
  • Rich in organic matter
  • Loamy soil produces the best results

Planting Details

From Seeds

  • Days to germination: 5-10 days under optimal conditions
  • Plant seeds ¼ inch deep
  • Keep soil consistently moist until germination
  • Optimal germination temperature: 70-75°F (21-24°C)

Spacing

  • Plants in garden: Space 12-18 inches apart
  • Row spacing: 18-24 inches between rows
  • Container planting: One plant per 8-inch pot, or 3 plants in a 12-inch pot

Care and Maintenance

Watering

  • Keep soil consistently moist but not waterlogged
  • Water deeply when the top inch of soil feels dry
  • Water at the base to avoid wetting leaves
  • Morning watering is preferable to prevent disease

Fertilizing

  • Apply balanced organic fertilizer (like fish emulsion) every 4-6 weeks

  • Container plants may need more frequent feeding (every 3-4 weeks)
  • Avoid over-fertilizing as it can reduce flavor intensity

Pruning and Harvesting

  • Begin harvesting when plants reach 6-8 inches tall
  • Regular pruning is crucial for bushy, productive plants
  • Pinch off flower buds as soon as they appear to extend the growing season
  • When harvesting, cut stems just above a pair of leaves to encourage branching
  • Never remove more than ⅓ of the plant at one time

Companion Planting

  • Good companions: Tomatoes, peppers, oregano, parsley
  • Poor companions: Rue and sage (can inhibit growth)

Common Problems

Pests

  • Aphids: Spray with water or insecticidal soap
  • Japanese beetles: Hand-pick or use row covers


  • Slugs: Create barriers with diatomaceous earth or copper tape

Diseases

  • Fusarium wilt: Use resistant varieties and practice crop rotation


  • Downy mildew: Improve air circulation, avoid overhead watering
  • Root rot: Ensure proper drainage, don't overwater


Growing Basil Indoors

  • Place near the sunniest window available
  • Supplement with grow lights during winter months
  • Rotate the plant regularly for even growth
  • Indoor plants often need less water than outdoor ones
  • Ensure good air circulation to prevent fungal issues

Harvesting and Storage

  • Harvest in the morning when oil content in leaves is highest
  • Regular harvesting encourages bushy growth
  • For fresh use: Store stems in water like flowers (room temperature)
  • For preservation: Freeze chopped leaves in olive oil in ice cube trays
  • Dried basil retains only a fraction of its flavor - freezing is better

Tips for Success

  1. Pinch early and often to create bushier plants with more leaves
  2. Protect from cold snaps even in summer - basil is very cold-sensitive
  3. Harvest entire stems rather than individual leaves for stronger plants
  4. If growing from cuttings, root them in water before planting in soil
  5. Succession planting every few weeks ensures continuous harvest

Basil is not only delicious but also beautiful and aromatic in the garden. With these guidelines, you'll be able to grow an abundant supply of this versatile herb throughout the growing season. Fresh basil elevates countless dishes, from classic Italian fare to Asian cuisine and refreshing summer drinks. Happy growing!


How to Grow Cucumbers: A Complete Guide


How to Grow Cucumbers: A Complete Guide

Cucumbers are one of the most rewarding vegetables to grow in your garden. These versatile fruits (yes, botanically they're fruits!) can be enjoyed fresh in salads, pickled for later, or used in refreshing summer drinks. With proper care, you can enjoy an abundant cucumber harvest throughout the growing season. Here's everything you need to know to successfully grow cucumbers.

Choosing Your Cucumber Variety

Before planting, consider which type best suits your needs:

  • Slicing cucumbers: Longer fruits ideal for fresh eating
  • Pickling cucumbers: Shorter, thicker-skinned varieties perfect for preserving
  • Burpless cucumbers: Contain less cucurbitacin, making them easier to digest
  • Bush varieties: Compact plants ideal for containers or small spaces
  • Vining varieties: Traditional plants that need trellising but produce higher yields

Planting Conditions

Timing

  • Plant after all danger of frost has passed
  • Soil temperature should be at least 60°F (16°C)
  • For most regions, this means late spring (May-June)

Temperature Preferences

  • Germination temperature: 65-85°F (18-29°C)
  • Optimal growing temperature: 70-85°F (21-29°C)
  • Will not tolerate frost - even temperatures below 50°F (10°C) can damage plants

Light Requirements

  • Full sun - at least 6-8 hours of direct sunlight daily
  • Will tolerate partial shade but with reduced yields

Soil Needs

  • Well-draining, fertile soil rich in organic matter
  • pH between 6.0-7.0
  • Add compost or well-rotted manure before planting
  • Cucumbers are heavy feeders and need nutrient-rich soil

Planting Details

From Seeds

  • Days to germination: 3-10 days under optimal conditions
  • Direct sow seeds ½-1 inch deep
  • Sow seeds in hills or rows depending on your garden layout

Spacing

  • Hills method: Plant 4-5 seeds per hill, thin to 2-3 strongest seedlings
  • Hill spacing: 3-5 feet apart
  • Row method: Space seeds 2-3 inches apart, thin to 8-12 inches
  • Row spacing: 3-5 feet between rows
  • Bush varieties: Can be spaced closer, about 2-3 feet apart
  • Container growing: One plant per 5-gallon container

Care and Maintenance

Watering

  • Consistent moisture is crucial for proper development
  • Water deeply 1-2 inches per week
  • Use drip irrigation or soaker hoses to keep foliage dry
  • Irregular watering leads to bitter or misshapen fruits

Fertilizing

  • Apply balanced fertilizer (10-10-10) before planting
  • Side-dress with additional nitrogen when plants begin to vine
  • Avoid over-fertilizing with nitrogen, which promotes foliage at the expense of fruit

Trellising and Support

  • Vining varieties benefit greatly from vertical support
  • Options include A-frame trellises, fence panels, or tomato cages
  • Trellising improves air circulation and reduces disease
  • Fruits grow straighter and cleaner when grown vertically

Mulching

  • Apply 2-3 inches of organic mulch after soil has warmed
  • Helps maintain soil moisture and temperature
  • Reduces weed competition
  • Keeps fruits clean by preventing soil contact

Common Problems

Pests

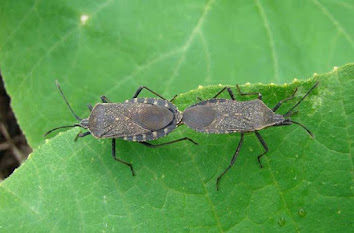
  • Cucumber beetles: Use row covers until flowering, hand-pick, or apply organic insecticides


  • Aphids: Spray with strong water stream or insecticidal soap


  • Spider mites: Increase humidity and use insecticidal soap


Diseases

  • Powdery mildew: Space plants properly, avoid overhead watering


  • Bacterial wilt: Transmitted by cucumber beetles - control the beetles!
  • (Video courtesy of Purdue Extension all rights reserved.)


  • Downy mildew: Use resistant varieties, ensure good air circulation


  • Angular leaf spot: Avoid overhead watering, practice crop rotation


Pollination

  • Cucumbers have separate male and female flowers on the same plant
  • Female flowers have a small cucumber-shaped swelling at the base


  • For successful fruit set, flowers need to be pollinated
  • Plant flowering companions to attract pollinators
  • Hand-pollinate if needed using a small brush

Harvesting

  • Harvest when cucumbers reach appropriate size for the variety
  • Slicing cucumbers: Usually 6-8 inches long
  • Pickling cucumbers: 2-4 inches long
  • Pick regularly to encourage continued production
  • Use scissors or pruners to cut fruits from the vine
  • Morning harvest yields the freshest, crispest fruits

Tips for Success

  1. Harvest frequently - even if you can't use all the cucumbers, removing them encourages more production
  2. Plant successive crops 2-3 weeks apart for extended harvest
  3. Choose disease-resistant varieties if powdery mildew is common in your area
  4. Female flowers will only appear after several male flowers have bloomed
  5. Avoid planting where other cucurbits (squash, melons) have grown recently

Container Growing

  • Select bush varieties or compact hybrids specifically bred for containers
  • Use minimum 5-gallon containers with excellent drainage
  • Provide vertical support even for bush varieties
  • Water more frequently than garden plants
  • Feed with diluted organic fertilizer every 2-3 weeks

With these guidelines, you'll be well-equipped to grow delicious, crisp cucumbers all season long. Whether you're making refreshing salads, pickling for winter enjoyment, or creating spa-worthy infused water, homegrown cucumbers offer unbeatable flavor and satisfaction. Happy gardening!


Saturday, April 26, 2025

Turning Waste to Wealth Composting 101: Easy Guide for Beginners


Turning Waste to Wealth  Composting 101: Easy Guide for Beginners 


Are you eager to convert your kitchen leftovers and garden debris into nutrient-rich soil for your plants? Composting is an effective and environmentally friendly method to enhance your garden's health. Here's an easy-to-follow, four-part guide tailored for beginners.


Part 1: Understanding Composting and Its Benefits


Composting is the natural process of recycling decomposed organic materials into a rich soil known as compost. By composting items like fruit peels, vegetable scraps, and dried leaves, you create a nutrient-dense substance that significantly benefits plant growth. Moreover, composting reduces the amount of waste sent to landfills, contributing positively to environmental health.


Part 2: Suitable Materials for Composting


Your compost pile should consist of two types of materials:

- **Greens**: These are moist and nutrient-rich items such as fruit and vegetable scraps, coffee grounds, tea bags, grass clippings, and eggshells.

- **Browns**: These are dry materials that facilitate airflow within the pile, including dried leaves, paper, cardboard, straw, and small twigs.


A balanced mix of greens and browns is crucial for effective composting. Avoid adding meat, dairy, or greasy foods as they can produce unpleasant odors and attract pests.


Part 3: Setting Up Your Composting Area


- **Choose a Location**: Select a convenient spot in your yard that is partially shaded to prevent the compost from drying out.

- **Prepare the Bin or Pile**: You can either purchase a compost bin or simply start a compost pile on the ground. For those with limited space, a bin is preferable.

- **Collecting Organic Waste**: Keep a small container in your kitchen to collect food scraps. Once full, transfer the contents to your compost area.

- **Building the Pile**: Begin with a layer of browns, add a layer of greens on top, and continue alternating. Chop larger items into smaller pieces to speed up the decomposition process.

- **Maintain the Pile**: Every few weeks, stir your compost with a shovel or pitchfork to aid decomposition and prevent odor.


Part 4: Utilizing Your Compost


After several months, your compost will transform into a dark, crumbly soil-like material. Once the original organic materials are no longer recognizable, the compost is ready to use. You can enrich your garden soil, mix it into potting soil, or use it as mulch for your plants.


Composting is not only simple and rewarding but also significantly beneficial for the planet. Start your composting journey today and turn your everyday waste into valuable garden treasure!

Tuesday, April 22, 2025

Growing Zucchini: A Complete Guide to Summer Squash Success


Growing Zucchini: A Complete Guide to Summer Squash Success


Zucchini is one of the most rewarding vegetables for home gardeners. With minimal effort, these prolific plants can produce an abundant harvest throughout the summer months. Here's everything you need to know to grow successful zucchini plants in your garden.

Getting Started: Seeds and Germination

Zucchini seeds germinate quickly, typically within 5-10 days when soil conditions are right. For best results:

  • Soil temperature should be at least 60°F (15°C), but ideally 70-85°F (21-29°C) for optimal germination
  • Plant seeds ½-1 inch deep in well-draining soil
  • Keep soil consistently moist but not waterlogged during germination
  • Consider starting seeds indoors 3-4 weeks before your last frost date

Spacing Requirements

Zucchini plants need room to spread out:

  • Hills method: Plant 2-3 seeds in mounds spaced 3-4 feet apart, then thin to the strongest seedling
  • Row planting: Space plants 2-3 feet apart within rows, with rows 3-4 feet apart
  • Container growing: Choose a 5-gallon container minimum for each plant (larger is better)

Remember that zucchini plants develop large leaves and can quickly take over a garden space if not given adequate room.

Light and Temperature Preferences

Zucchini thrives in full sun and warm temperatures:

  • Light requirements: 6-8 hours of direct sunlight daily (minimum)
  • Temperature range: 65-95°F (18-35°C) for optimal growth
  • Frost sensitivity: Extremely frost-sensitive; wait until all danger of frost has passed before planting outdoors
  • Season extension: Use row covers for early planting, but remove when flowers appear to allow pollination

Soil and Water Requirements

  • Soil type: Rich, well-draining soil with plenty of organic matter
  • pH level: 6.0-7.5 is ideal
  • Water needs: 1-2 inches of water per week; consistent moisture is important, especially during fruit development
  • Mulching: Apply 2-3 inches of organic mulch to retain moisture and suppress weeds

Fertilization

Zucchini are heavy feeders:

  • Add compost or aged manure to planting area before sowing
  • Apply a balanced organic fertilizer (like 10-10-10) at planting time
  • Side-dress with compost or balanced fertilizer when plants begin to flower
  • Avoid excessive nitrogen, which promotes leaf growth at the expense of fruit production

Pollination

Zucchini plants produce separate male and female flowers on the same plant. For fruit development:

  • Female flowers have a small, immature fruit at their base


  • Male flowers appear first, usually in greater numbers
  • Bees and other insects are essential for pollination
  • If you notice flowers dropping without fruit development, you may need to hand-pollinate

Common Pests and Diseases

Watch for these common issues:

  1. Squash bugs: Look for bronze-colored eggs on leaf undersides and remove them


  1. Cucumber beetles: Yellow and black striped beetles that can spread bacterial wilt


  1. Powdery mildew: White powdery substance on leaves; provide good air circulation and avoid overhead watering
  2. Blossom end rot: Black rot on fruit ends caused by calcium deficiency or inconsistent watering
  3. Squash vine borers: Moths that lay eggs at plant base; watch for wilting stems


Harvesting Tips

  • Harvest zucchini when they're small, typically 6-8 inches long
  • Check plants daily during peak season; zucchini can grow from tiny to enormous in just a day or two
  • Use a sharp knife or pruners to cut fruit from the vine rather than twisting
  • Regular harvesting encourages continued production
  • Most varieties reach harvestable size 45-60 days after planting

Companion Planting

Zucchini grows well with:

  • Nasturtiums (repel pests)
  • Marigolds (deter nematodes)
  • Corn (provides light shade and wind protection)
  • Herbs like mint and dill (attract beneficial insects)

Avoid planting near potatoes, which can inhibit growth.

With these guidelines, you'll be well on your way to a bountiful zucchini harvest that will likely have you sharing with neighbors and friends by mid-summer!


Growing Cherry Tomatoes: A Complete Guide


Growing Cherry Tomatoes: A Complete Guide


Cherry tomatoes are one of the most rewarding vegetables to grow in your garden or containers. These small, sweet fruits are prolific producers and relatively easy to cultivate even for beginners. This guide covers everything you need to know to successfully grow cherry tomatoes from seed to harvest.

Getting Started: Seeds and Germination

Cherry tomato seeds typically germinate in 5-10 days under optimal conditions. For best results:

  • Start seeds indoors 6-8 weeks before your last frost date
  • Use a quality seed starting mix in clean containers with drainage
  • Maintain soil temperature between 70-80°F (21-27°C) for fastest germination
  • Keep soil consistently moist but not waterlogged
  • Once seedlings emerge, provide bright light immediately

Light Requirements

Cherry tomatoes are sun-loving plants that require:

  • Full sun (6-8 hours minimum of direct sunlight daily)
  • South-facing exposure is ideal in the Northern Hemisphere
  • Insufficient light results in leggy plants and reduced fruit production

Temperature Preferences

Cherry tomatoes are warm-season crops with specific temperature needs:

  • Ideal daytime temperatures: 70-85°F (21-29°C)
  • Ideal nighttime temperatures: 60-70°F (15-21°C)
  • Will stop growing below 50°F (10°C)
  • Can be damaged by temperatures above 95°F (35°C)
  • Protect from frost at all costs – even a light frost can kill plants

Spacing Guidelines

Proper spacing is crucial for healthy plants and good airflow:

  • In-ground rows: Space plants 18-24 inches apart with 3-4 feet between rows
  • Raised beds: 18-24 inches between plants in all directions
  • Containers: One plant per 5-gallon container minimum (larger is better)
  • Square foot gardening: One cherry tomato plant per 4 square feet

Soil Requirements

Cherry tomatoes thrive in:

  • Well-draining, loamy soil rich in organic matter
  • Slightly acidic to neutral pH (6.0-7.0)
  • Soil amended with compost before planting
  • Avoid heavy clay soils that retain too much moisture

Watering Practices

Consistent watering is key for preventing problems:

  • Water deeply 1-2 times per week rather than frequent shallow watering
  • Aim for 1-2 inches of water weekly (adjust for rainfall)
  • Water at the base of plants to keep foliage dry
  • Mulch with 2-3 inches of organic material to retain moisture and suppress weeds
  • Increase watering during fruit production and hot weather

Support Systems

Most cherry tomato varieties are indeterminate (continuously growing) and require support:

  • Cages: 5-6 feet tall minimum for most cherry varieties
  • Stakes: 6-8 feet tall driven 1 foot into the ground
  • Trellises: Excellent for maximizing space and air circulation
  • String systems: Popular for greenhouse growing

Pruning and Maintenance

Regular maintenance improves plant health and productivity:

  • Remove suckers (side shoots that form in leaf axils) for better air circulation


  • Prune lower leaves that touch the soil to prevent disease spread
  • Remove any yellowing or diseased foliage promptly
  • Harvest regularly to encourage continued production

Fertilization

Cherry tomatoes are moderate to heavy feeders:

  • Apply balanced fertilizer (such as 10-10-10) at planting time
  • Switch to lower nitrogen, higher phosphorus and potassium fertilizer once flowering begins
  • Side-dress with compost or balanced fertilizer every 4-6 weeks
  • Consider calcium supplementation to prevent blossom end rot

Harvesting

Cherry tomatoes are ready to harvest:

  • 50-80 days after transplanting (variety dependent)
  • When fully colored (red, yellow, black, etc. depending on variety)
  • When slightly soft to the touch but still firm
  • For best flavor, pick in the morning after dew has dried

Common Problems and Solutions

  • Blossom end rot: Ensure consistent watering and adequate calcium


  • Cracking: Maintain even soil moisture, especially during fruit ripening


  • Early blight/Late blight: Improve air circulation, avoid wetting foliage
  • Aphids/Whiteflies: Introduce beneficial insects or use insecticidal soap


  • Tomato hornworms: Handpick and remove, or use Bt (Bacillus thuringiensis)


With proper care and attention to these key factors, you'll be enjoying a bountiful harvest of delicious cherry tomatoes throughout the growing season!


Wednesday, April 16, 2025

How to Grow Carrots: A Complete Guide


How to Grow Carrots: A Complete Guide


Carrots are one of the most rewarding vegetables to grow in your garden. These versatile root vegetables are not only delicious but also packed with nutrients. With proper care and attention, you can harvest crisp, sweet carrots right from your own backyard. Here's everything you need to know to successfully grow carrots.

Choosing the Right Variety

Before planting, consider which carrot variety suits your needs:

  • Nantes: Medium-length, sweet, and great for containers
  • Chantenay: Shorter, broader carrots that do well in heavier soils
  • Danvers: Medium to long carrots with good disease resistance
  • Imperator: Long, tapered carrots (similar to grocery store types)
  • Ball or Paris Market: Round, small carrots perfect for shallow soils

Planting Conditions

Timing

  • Plant 3-5 weeks before the last spring frost date
  • For fall harvest, plant 10-12 weeks before first fall frost
  • Carrots grow best in cool weather (60-70°F/15-21°C)

Soil Preparation

  • Loose, well-draining sandy loam is ideal
  • Remove rocks, clods, and debris that could cause misshapen roots
  • Till soil 12 inches deep to provide adequate space for root development
  • pH between 6.0-6.8 is optimal

Planting Details

Spacing

  • Plant seeds ¼ inch deep
  • Space seeds ½ inch apart in rows
  • Keep rows 12-18 inches apart
  • Thin seedlings to 2-3 inches apart once they reach 2 inches tall

Light Requirements

  • Full sun (6+ hours daily) is preferred
  • Will tolerate partial shade but may grow more slowly

Temperature Preference

  • Seeds germinate best at 55-75°F (13-24°C)
  • Optimal growing temperature: 60-70°F (15-21°C)
  • Temperatures above 80°F (27°C) can result in bitter, tough carrots

Days to Germination

  • 14-21 days (can be slower in cooler soil)
  • Be patient! Carrot seeds are notoriously slow to germinate
  • Keep soil consistently moist during germination period

Care and Maintenance

Watering

  • Consistent moisture is crucial
  • Water deeply 1-2 times per week (1 inch of water)
  • Avoid letting soil dry out completely between waterings
  • Reduce watering as harvest approaches to prevent splitting

Fertilizing

  • Light feeder - too much nitrogen causes forked roots
  • Apply balanced fertilizer (10-10-10) before planting
  • Side dress once during growing season with compost or balanced fertilizer

Mulching

  • Apply light mulch to retain moisture
  • Keep soil surface from crusting
  • Helps prevent "green shoulders" (tops exposed to sun)

Thinning

  • Critical for proper development
  • First thinning: when seedlings are 2 inches tall, to 2 inches apart
  • Second thinning: when tops are 4 inches high, to 3-4 inches apart
  • Save thinned seedlings for salads - they're edible!

Common Problems

Pests

  • Carrot rust fly: Cover with row cover or plant companion plants like onions


  • Carrot weevil: Practice crop rotation


  • Aphids: Spray with insecticidal soap

Diseases

  • Leaf blight: Ensure good air circulation
  • Root rot: Avoid overwatering


  • Powdery mildew: Space properly for air circulation

Growth Issues

  • Forked roots: Usually from rocky soil or too much nitrogen


  • Stubby roots: Soil may be too heavy or compacted


  • Hairy roots: Excessive moisture or nematodes

Harvesting


  • Baby carrots: 50-60 days
  • Full-size carrots: 65-80 days depending on variety
  • Harvest when tops of roots are 3/4 to 1 inch in diameter
  • Loosen soil around carrots before pulling to prevent breakage
  • Harvest in morning for sweetest flavor
  • Cut tops to 1/2 inch before storing

Storage

  • Remove tops completely for long-term storage
  • Store unwashed in plastic bags in refrigerator (32-38°F/0-3°C)
  • Can last 4-6 months in proper cold storage
  • Can also be left in ground during winter in mild climates (mulch heavily)

With these guidelines, you'll be well on your way to growing delicious, crunchy carrots. Remember that consistent care and patience are key to successful carrot cultivation. Happy gardening!


How to Grow Spinach: A Complete Guide

  How to Grow Spinach: A Complete Guide Spinach is one of the most nutritious and versatile leafy greens you can grow in your garden. With ...